Friday, September 30, 2011

Baby Gifts

One of my team members at work offically became a Daddy yesterday!  He's been so excited all week waiting for this day.  So refreshing to see the twinkle in his eye!  We had a small gathering to watch him open our group gift.  However, I wanted to make something special for him.  So today I thought I would share my special baby gifts with you.


Here's my It's a Boy Card.
The Stamp set is retired now, but still one of my favorites - Nursery Necessities
Cardstock: Whisper White, Basic Black, Bashful Blue, Certainly Celery, So Saffron.
1 1/4" Square Punch, 1 3/8" Punch, retired Star Punch and 1/4" Bashful Blue grosgrain ribbon.


Here are my Baby Gifts.   An altered Frame and a Mini Baby Album.


The wooden frame is covered with Designer Paper and then decorated.   Trying to use some of my stock pile of paper.  I believe this maybe non SU, not sure though.  I used the Timeless Type Alphabet dies to make the name.  Then using Early Espresso cardstock and the Big Shot Multipurpose Adhesive sheets to adhere the Baby's Name to the frame.  So much easier that way.  " It's a Boy "  from the retired Nursery Necessities stamp set.  Hearts punched with the small heart punch and then I used the Itty Bitty Punch Pack flower punch to dot the " I "in Charlie.


This cute little Mini Baby Album is perfect for a New Daddy to display his pictures of his new baby boy!
There are four pages inside of the cute album.  I used several retired stamp sets on the album,  "I'm Here ", " Bundle of Joy "  and the " Nursery Necessities ".   Retired Brocade Blue cardstock and accented with Early Espresso.  1/8" Early Espresso Tafetta Ribbon and Ink.


This Mini Album was in the Stampin' Success magazine that we receive each month from Stampin' Up.  Super Easy to make and you can make additional pages too!  That way our Proud Daddy can always have the most current ones to show off.  Take the older pages out and start your scrapbook with them.

So nice to give a handmade gift to someone!

Thanks for taking time to stop by to check out my blog!!

Have a wonderful weekend and stamp something fun for someone special.

Happy Stamping!!!
        Sue

Sunday, September 25, 2011

Frightful Sights Halloween Loli Wreath

I made my first Loli Wreath while I was at my mother-in-law's house a couple of weeks back.  I had used the retired Wicked Fun Designer paper.  You can click   ( Here ) to view my first one.

Now that I have had a little time to think about how I made the first one, I have made some changes.  First I found a larger base made of wood which is used for a flower arrangement wreath.  It makes a  12" wreath rather than the 9" wreath that I made the first time.  This allows you to use a much larger Loli to make your wreath.  I think it makes it look a little fuller than my original wreath.

As I'm getting ready for the Halloween season, I took this picture after I had my NEW Halloween Wreath on my front door.


I really love how this one turned out !!  Now I'm probably going to be in trouble when my mother-in -law sees how this one turned out.  I had a lot of fun making both of them.  Next I want to do a Wreath using the Spice Cake Designer Paper for Fall and Thanksgiving. 


Here's a little closer view.

EDITED:  To make the Big Loli I used (2 ) strips of Designer Paper each strip measures  2 1/2 "  x  12" for a total of 24", then scored every 1/2".   To make the Smaller Loli I used ( 2 ) strips of Designer Paper each strip measures 1 1/2"  x  12" for a total of 24", then scored every 1/2".   So when you fold you do one strip starting by folding up and the second strip starting by folding down.  Adhere together with snail and then I used the 1/8" circle hand punch at the top of each fold.  You can group about 6 of them together at a time, so that the hole lines up.  Then take Baker's Twine and thread through each fold to pull together and tie off.  This will hold it together better for you.  I punched a 1 3/4" Circle for each back and then decorate the fronts with different sizes of circles to make it a little sturdier.   Hope that helps. 
I found a link for the wooden 12 " flower base that I used.   ( Here )
I used the Frightful Sight Designer Paper almost both sides of each sheet.
Stamp Sets:  Scaredy Cat, Spooky Bingo Bits
Simply Scored Scoring Tool  -  If you haven't gotten one yet, it needs to be moved up to the top of your wish list.
Ink: Cajun Craze, Stazon Black, Lucky Limeade
Cardstock:  Cajun Craze, Basic Black, Lucky Limeade, Whisper White
Punches:  1 3/4" Circle punch, 1 3/8" Circle punch, 1 1/4" Circle punch, 1" Circle punch, Blossom Bouquet Triple Layer punch, 2 3/8" Scallop Circle punch, 1 3/4" Scallop Circle punch, Retired Bat punch.
Peek a Boo Frame Bigz Die, Big Shot, Regal Designer Buttons, Antique Brads, Neutral and Brights Glimmer Brads, Dazzling Details, White Gel Pen, Jewels Basic Rhinestones, Retired Designer Jewels - Black Flourish, 1 1/4" Basic Black Striped Grosgrain Ribbon, Hot Glue Gun.

I hope that you are having a GREAT weekend !!!

Thanks for taking time to stop by and check out my blog !!

Happy Stamping !!!
        Sue

Monday, September 19, 2011

Hostess Gifts for Stamp Club

Well it was a busy week for sure, hope that you all had a wonderful weekend!  Thursday night was the first meeting for my next session of Stamp Club.  Now last week I showed you my Thank You Nugget Purse, it's my little "Thank You" to my Stamp Club ladies.  Now they each take a turn to be the Hostess with the Mostest.  Not sure if that is a word, but oh well they are awesome ladies!!

So I usually have a couple of FUN gifts for them as a "Thank You" from me for being a Hostess.

First up is something that everyone should have. 


It's a Baker's Twine Dispenser or Holder!!  I saw these cute Hostess gifts over at Patty Bennet's blog.   ( Here )    Patty thinks she saw the original idea over on Diana Gibbs blog, but Marie Shaughnessy also has this on her blog as a Storage Idea.  ( Here )   I think I have said this before, but I am always amazed and then so excited when someone creates something or finds a different way to use Stampin' Up products!!!   Well this is right up at the top of the list with me. 


So have you already guessed that these are the containers that usually have all kinds of Stampin' Up  products inside.  Like buttons, brads, mini clips, jingle bells the list goes on and on.  Well the inside that has the Baker's Twine wrapped all around it are the plastic holders in that you find in the center of all your Rolls of Ribbon.  Now how clever is that!!  I only had time to make one of these cute holders so far, but Patty has several other ideas on how to decorate them.


Now those of you who were at Convention should recognize the Idea Book and Catalog Stickers that we could purchase.  The ladies were Super excited when I pulled these out!!  As each of them will be receiving their very own set of Stickers and of course each Stamp Club member receives a copy of the Current Idea Book & Catalog. 

Now don't you wish you were here to participate in all the FUN!!

It's never too late!

Thanks for taking time to stop by today!!

Happy Stamping !!!!
        Sue

Saturday, September 17, 2011

The Simply Scored Diagonal Plate


Mar1-May31_USCA_Cust_DiagScorePlateLP_2012


I'm happy to announce the Stampin Up Simply Scored Diagonal Plate, perfect for creating envelopes, boxes, and more! It’s the must-have companion to your Simply Scored scoring tool.
Item number #125586 and it's only $11.95
Watch this video from Stampin Up to see it in action!! 


Product Features
  • Sits on top of the Simply Scored base
  • Held securely in place by rubber pads on back of the plate
  • Has etched grooves every 1/8"
  • Can score any size card stock up to 12" x 12"
  • Includes instructions for creating common envelope size
Thanks and have a great day!!

Wednesday, September 14, 2011

September Stamp Club Projects

Well it's almost time for the 1st Stamp Club meeting of my next session.  I promised that I would be posting the FUN Halloween Projects that we will be making on Thursday night.  It's time to take a look at what I've got planned for Stamp Club.

So without further delay, here we go!

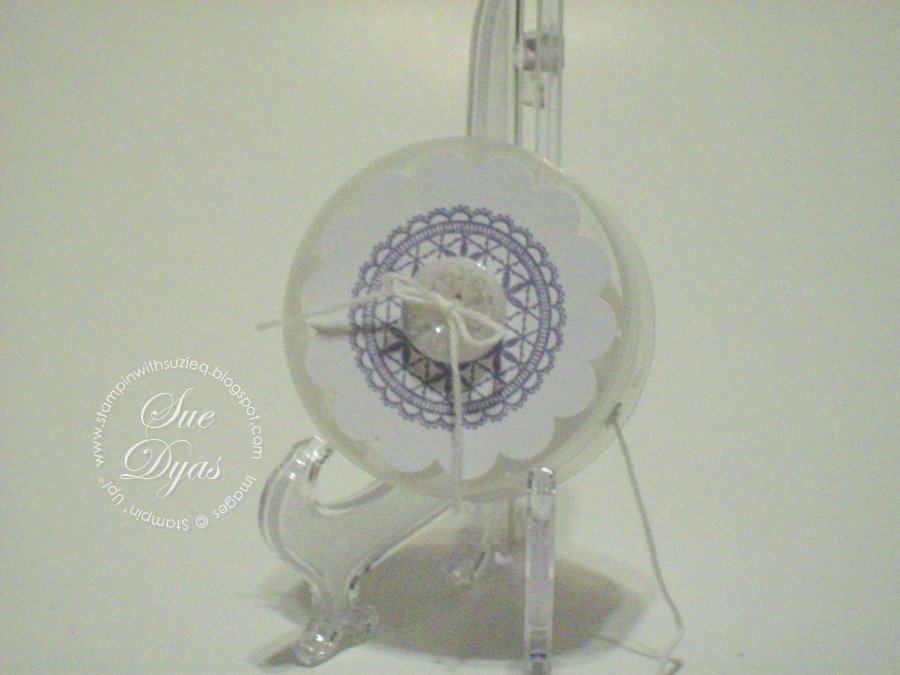
How about these cute Halloween Hand Sanitizer Holders:


I've done several of these in the past, but I saw this one over on Dawn Griffith's blog.   It just caught my eye right away.   So of course I had to gave it a try.  This is a total case of what Dawn did.  I tried to change it up by using some of the other Spooky Bingo Bits stamps, but it just didn't do it for me.  It was just too stinkin' cute the way it was !!!
You can check out Dawn's blog to watch the video.  ( Here )


Here's a open view of the Halloween Hand Sanitizer Holder.  Check out how the sanitizer coordinates with the box!  That must be why I couldn't change this one up, even just a little bit.  The best thing about Dawn's holder is that you can make 4 of these out of just one piece of 8 1/2 x 11 cardstock.  Bonus!

Next we have a Two Tags Treat Holder that I saw over at Angie Kennedy Juda's blog. 


Angie is doing the 12 Weeks of Halloween. 
This one is Week 2 of the projects that she is featuring. 


Here's a side view so that you can see the CHOCOLATE inside.  I did change this one up, by using the New Peekaboo Frames Die and the Spooky Bingo Bits stamp set.  Did I tell you that I just LOVE that Peekaboo Die !!!!  Really makes this a special Treat Holder for Halloween and super easy to make!  You can check out Angie's blog and video  ( Here )

The third project is my Peekaboo Halloween Card. 
Are you ready ???     Believe it or not, this is actually MY VERY OWN idea!  
I do have an occasional one every now and then.  LOL


I used the Peekaboo Frame Die again.  It's a must have for me, so many possibilities come to mind.


Here is a view showing what's underneath the Peekaboo Frame.  So Fun to have something to open on the front of the card. 


Here's the inside view.  Halloween and Christmas are 2 of my Favorite Holidays to make hand made gifts and cards for family and friends. 

Recipe:
Stamp Sets:  Spooky Bingo Bits, It's a Wrap Holidays, Hand Penned Holidays, Grateful Greetings
Cardstock:  Old Olive   4 1/4" x 9 1/4"  Scored @ 5 1/2"
                   Basic Black  3 1/2" x 4"
                   Cajun Craze
                   Whisper White
Frightful Sight Designer Paper 3 1/4" x 3 3/4"
Black Stazon Ink
Lucky Limeade, Cajun Craze, So Saffron  Markers
Big Shot, Peekaboo Frame Die, Postage Stamp Punch, 1" Square Punch, Basic Jewels Rhinestones

Now don't you wish you were coming on Thursday to make some FUN Halloween gifts !!

Special Thanks to both Dawn and Angie for sharing their creativity!!!

Thanks for taking time to stop by and check out my blog today!

Happy Stamping  !!!
         Sue

Monday, September 12, 2011

Thank You Nugget Purse

Wow, time sure does fly by so quickly!  I can't believe that I forgot about my anniversary!  My blogging anniversary was September 3rd, exactly one year since I took the plunge into the Blogging World.  I must say that I have enjoyed every minute of it! 

With the next session of Stamp Club starting on Thursday, I've been busy working on Make and Take Projects.  Stop back later this week to check out the FUN Halloween projects that we'll be making. 
But today, I wanted to show you one of the Thank You gifts that I will be giving each of my Stamp Club members on Thursday evening. 

So here's the first Thank You gift:   A "Thank You"  Nugget Purse. 


Aren't these little Nugget Purses too cute!  Each Stamp Club member needs a Special "Thank You" and I thought this would be a great Thank You gift.  I saw these over at Angie Kennedy Juda's Blog and I thought it was such a FUN way to show off the New In Colors too !   Yes, I am missing one of the New In Colors, Island Indigo as I didn't have the New Ruffled Ribbon yet. 
Angie has a video too, just click ( Here )  to get there. 


Here's a close up of them.  
I used the It's a Wrap Occasions stamp set.  The Hershey Nuggets have belly bands made from Whisper White cardstock.  These are just one of the Thank You gifts that they will be receiving.  I have a couple more FUN things planned for them too, which I will show you later.

Thanks for stopping by today to check out my blog! 

Happy Stamping !!!
        Sue

Sunday, September 11, 2011

Remembering 9/11

Remembering those who lost their lives in the tragedy on 9/11/01, thankful for those who defend our country, and grateful for our wonderful nation!


Image: People react during ceremonies marking the 10th anniversary of the 9/11 attacks on the World Trade Center, in New York, Sunday (© Eric Thayer/Reuters)

Tuesday, September 6, 2011

Halloween Wreath

Happy Tuesday morning!  Long weekend and out of town for most of it.  However, I did want to show you what I did have time to make over the weekend.  While at my mother-in-law's house I made her a Halloween Wreath.  I figured I would give this a try and see what happened. 


The Halloween Wreath is made using retired Wicked Fun Designer Paper from last year.  I figured I would try that first, just in case.  The bats are from a punch my mother-in-law had.  I did use a few of the Basics Glimmer Brads, Regals Designer Buttons, and a retired Designer Fabric Brad on the top.  I used the Spooky Bingo Bits and the Scaredy Cat stamp sets.  To finish it off I used the 1 1/4" Striped Basic Black grosgrain ribbon.  Cardstock colors were Basic Black, Old Olive, Rich Razzleberry and Cajun Craze.  Most importantly I got to use my New Simply Scored Scoring Tool, which is in the Holiday Mini.  Ladies, need I tell you that this is a MUST have for sure!!!    Then I even forgot to bring my camera, so I had to use my cell phone to take the picture.  That's what happens when you're in a hurry to leave.  I didn't think it turned out too bad for a first try, so I'll be working on one for myself to hang on the front door for the Halloween Season. 

Hope everyone had a wonderful holiday weekend!

Thanks for stopping by to check out my blog!

Happy Stamping !!!!
        Sue

Thursday, September 1, 2011

Stamp Share Make & Takes

As I promised you earlier this week, I have the Stamp Share Make & Takes from our August Quarterly Meeting to share with you.   The first Quarterly Meeting after Convention is always jam packed with Idea Sharing and Demos.   We actually had 7 Demonstrations this time.  One being my very own Warmest of Wishes Halloween Box and Card that I showed you last week.  You can click ( Here ) to see that post.

Here's the first of the three Make and Takes.


We'll call it the Spooky Halloween Card.  Don't you just love how the bows are now the BATS!!!


Here's a picture of the inside, a little blurry but you can see  that it has more of the Spooky Bingo Bits Stamps down one side.

Stamp Set:  Spooky Bingo Bits
Cardstock:  Basic Black, Tangerine Tango, Daffodil Delight
Spider Web Embossing Folder, Basic Black 5/8" Satin Ribbon, 1 3/4" Circle Punch    

For the 2nd Make and Take we have a Merry Christmas Shaker Card.


This is just too cute and so Fun to make !!   We got to use the New Shaker Frames and the Snow Burst Embossing Folder in the Holiday Mini which starts today !! 


Here's a picture of the inside of this card it has some cute mittens from the Jolly Bingo bits stamped in the corner on the inside.  Don't you just love the penquin's little heart!  We used the Crop-A-Dile to make the bow, you can see this a little better from the back side.  Best thing is it doesn't slide around at all.

Stamp Sets:  Jolly Bingo Bits, Petite Pairs
Cardstock:  Real Red, Whisper White
Word Window Punch, 1 1/4" Circle Punch, Owl Builder Punch, Crop-A-Dile

And last up we'll call it the Rolling Hills Card.


For this card we made some templates for the Rolling Hills, so cute.  Then adhered them together and put them through the Big Shot using the Polka Dot Embossing Folder.  That way all the Polka Dots line up perfectly!

Stamp Set:  Trendy Trees
Cardstock:  Crumb Cake, Whisper White, So Saffron, Pumpkin Pie, Real Red, River Rock, Pear Pizzaz, Lucky Limeade
Word Window Punch, Modern Label Punch, Lace Ribbon Border Punch, Blossom Bouquet Triple Layer Punch, Itty Bitty Shapes Punch Pack, Jewels Basic Rhinestones


Now to Thank both Susan Campfield and Brenda Cardinal for their awesome ideas for our Make and Take projects !!!!!


Be sure to check out the New Holiday Mini !!  It's on my right hand side bar.  You'll want to make that wish list right away.  Don't forget you can go shopping 24/7 at my online store, also on my right hand side bar. 

Thanks for stopping by today !!!

Happy Stamping !!!
        Sue 

LinkWithin

Related Posts Plugin for WordPress, Blogger...